Posts filed under Programming

Add CA Certificates To Python

Python checks SSL certificates when doing stuff over HTTPS. You want to make sure that the communications channel is secure. When you’re experimenting you might want to disable SSL verification (temporary), but there are scenarios where this is not possible. This happens when e.g. you need to install or update through pip, or when a library doesn’t offer a way to ignore or suppress certificate errors. This becomes a challenge in the following circumstances;

  • a company policy to check outgoing traffic by decrypting all outgoing https traffic,

  • or when you’re using tools like Burp Suite / OWASP ZAP Proxy to inspect content in API calls etc.

In these cases you’re only solution is to add the root certifcates of those MITM tools to the Python certificate bundle (or create your own bundle). In this case I’ll be adding my own Root CA certificates to the existing bundle. This is not a permanent solution, since they might get overwritten with (pip) updates. But it works for me for the time being.

Start a Python interpreter;

>>> import certifi
>>> certifi.where()
<pythonpath>\lib\site-packages\certifi\cacert.pem

This cacert.pem file contains all root CA’s typically found in most browsers and operating systems. Just add your CA (in BASE64 format) at the end of the file and you’ll be good to go (until a next certifi update).

Posted on August 22, 2023 and filed under Programming, Tips'n Tricks.

Raspberry Pi OPNsense Captive Portal Voucher Generation

When I received my new HP/Aruba iAP-305-RW access points I started to think about introducing a wireless guest network. Not a network with a pre-shared key, but something more secure and flexible. The HP/Aruba AP’s have the option for captive portal, but it doesn’t have a good integration with ACME/Let’s Encrypt certificates. My OPNsense firewall has very good integration with ACME/Let’s Encypt, and has the option of deploying a Captive Portal.

Configuring the Captive Portal on the OPNsense firewall is pretty straightforward. It’s well documented, and is up-and-running in minutes. The main challenge was creating a way to supply the credentials to the users. The default option is to generate voucher codes and print them. Not really an option, since I loose those pieces of paper before I even printed them.

The newer OPNsense software has a decent API, which also includes API options for captive portal. This opened up an option including a Raspberry Pi.

Posted on July 19, 2023 and filed under Programming, Raspberry Pi, Security, Gadgets.

Clear Cookies in Postman

During a Proof-of-Concept I ran into some challenges while using Postman. I had to test certain API calls based on different user-credentials, and for some reason eveything kept working like I was the super-admin.

Turned out that the application used cookies, and after the initial authentication of the super-admin, postman used to cookie to authenticate the new sessions based on another username and password.

Thankfully, it’s possible to delete cookies in postman before running a request in the ‘Pre-request Script’.

Just add the following script in the ‘Pre-request Script’ section of the request, or Collection;

const jar = pm.cookies.jar(); jar.clear(pm.request.url, function (error) { // error - <Error> });
2021-10-08.png

There’s one other setting that needs to be set, and that’s in the cookies section where you need to Whitelist the domain. Which allows Postman to interact with cookies from that domain.

2021-10-08_10-32-42.png
2021-10-08_10-33-16.png

Add the domain (or in my case the IP address) show that issued the cookie to the whitelist domains

2021-10-08_10-33-28.png

After that, the cookies can automatically be removed by the ‘Pre-request Script’, and everything would work as I intended.

Posted on October 8, 2021 and filed under Programming, Tips'n Tricks.

My First Docker Deployment

About two weeks ago I had to get a crash-course in Docker technology at work. I had no idea what I was doing (following a YouTube video and an accompanying PDF. Eventually I got it to work but no idea what I was doing. So I wanted to change that.

NOTE: I’m not gonna build/create new docker containers yet. Just learning on how they are used, configured, and interact. This is also no tutorial on how to install Docker itself. There are more than enough websites for that.

The problem with learning new things is that they have to be practically and/or useful (for me). After some thought I ended up with a combination of Transmission and OpenVPN.

This Docker image gives you a Torrent client with a webgui, and all (torrent) traffic is directed through the OpenVPN connection. Making it safe to download Linux distro’s. As a bonus, it has a generic web proxy function with you can use to handle your web traffic. The latter is especially useful in combination with e.g. the browser extension/plugin FoxyProxy.

Deploying the docker container is pretty straight-forward (you do need a supported VPN provider). It basically works out of the box, but molding it to my wishes involved a bit more digging around. There are some things I wanted to add, or change;

  • Customer paths for the download locations (default = /data).

  • Use a watchfolder for transmission where the .torrent files can be picked-up.

  • Use an additional reverse proxy for the Transmission webGui so that all my internal services are accessible from 1 IP address without having to remember al their TCP ports.
    More info on that can be found here.

  • Since the Docker container runs under a/the root account, I needed to change that behavior since I don’t want to do everything with root permissions (involving experimentation with umask and UID/GID’s).

This resulted in the following docker-compose file (docker-compose.yaml):

UPDATE: I’ve added the Portainer image to the compose file. This gives you a web gui to manage the containers. The gui is accessible on port 9000 on the same docker host.

version: '2'
services:
    transmission-openvpn:
        restart: unless-stopped
        volumes:
            - '/mnt/data:/data'
            - '/mnt/stack/Watchfolder:/home/Watchfolder'
            - '/etc/localtime:/etc/localtime:ro'
        environment:
            - TZ=Europe/Amsterdam
            - OPENVPN_OPTS=--inactive 3600 --ping 10 --ping-exit 60
            - CREATE_TUN_DEVICE=true
            - OPENVPN_PROVIDER=NORDVPN 
            - OPENVPN_USERNAME=<VPN-USERNAME>
            - OPENVPN_PASSWORD=<VPN-PASSWORD>
            - NORDVPN_COUNTRY=CH
            - HEALTH_CHECK_HOST=google.com
            - TRANSMISSION_INCOMPLETE_DIR_ENABLED=true
            - TRANSMISSION_INCOMPLETE_DIR=/data/downloads/incomplete
            - TRANSMISSION_DOWNLOAD_DIR_ENABLED=true
            - TRANSMISSION_DOWNLOAD_DIR=/data/downloads/complete
            - TRANSMISSION_WATCH_DIR_ENABLED=true
            - TRANSMISSION_WATCH_DIR=/home/Watchfolder
            - TRANSMISSION_TRASH_ORIGINAL_TORRENT_FILES=true
#            - TRANSMISSION_UMASK=222
            - TRANSMISSION_SPEED_LIMIT_DOWN=5000
            - TRANSMISSION_SPEED_LIMIT_DOWN_ENABLED=true
            - TRANSMISSION_SPEED_LIMIT_UP=1000
            - TRANSMISSION_SPEED_LIMIT_UP_ENABLED=true
            - WEBPROXY_ENABLED=true
            - WEBPROXY_PORT=8080
            - LOCAL_NETWORK=192.168.0.0/16
            - PUID=1000
            - PGID=1000
        cap_add:
            - NET_ADMIN
        logging:
            driver: json-file
            options:
                max-size: 10m
        ports:
                - '9091:9091'
                - '8888:8080'
        image: haugene/transmission-openvpn
        container_name: openvpn
    portainer:
        image: portainer/portainer-ce
        container_name: portainer
        restart: always
        ports:
          - "9000:9000"
        command: -H unix:///var/run/docker.sock
        volumes:
          - /var/run/docker.sock:/var/run/docker.sock
          - portainer_data:/data

volumes:
  portainer_data:

The thing that took the most amount of time to figure out was the PUID/PGID part of the config. This basically are the user id and group id which are used to run the container and also when creating directories and files on the physical filesystem of the host. In my case, the PUID, and PGID are the id’s corresponding to my username on the Linux host.

The important part is that all the path references in the environment part of the yaml file are local to the container. These are mapped/related to the physical locations in the volumes part of the config file.

Deploying/creating the Docker container is done through the following command (I use docker-compose instead of docker run):

docker-compose up -d

Configuring a webproxy in my browser pointing to the Linux host IP with port 8888 allows me to surf the web through the OpenVPN provider. Pointing my browser to the Linux host IP address with port 9091 gives the Transmission webGui (http://IP-ADDRESS>:9091). But as I mentioned earlier, I want to access this through my internal reverse proxy (NGINX).

To do this I have to create an additional location within the NGINX config and enable that. This resulted in the following NGINX location config file:

location /transmission/ {
      proxy_pass http://192.168.##.1:9091;

      proxy_set_header X-Real-IP $remote_addr;
      proxy_set_header X-Forwarded-For $proxy_add_x_forwarded_for;
      proxy_set_header Host $http_host;
      proxy_set_header X-NginX-Proxy true;
      proxy_http_version 1.1;
      proxy_set_header Connection "";
      proxy_pass_header X-Transmission-Session-Id;
      add_header   Front-End-Https   on;

      satisfy any;
      allow 192.168.0.0/16;
      allow 172.16.16.0/24;
      allow 10.200.200.200/32;
      deny all;
      auth_basic "Restricted Content";
      auth_basic_user_file /etc/nginx/auth.d/auth.pwd;
}

Note that the bottom part are some directoves to limit the IP’s that can access the page. These are related to your internal IP networks.

Now I can access the tranmission webGui over https through my NGINX reverse proxy via https://internalhost/transmission

A small note on the use of FoxyProxy; This extension allows you to selectively use the proxy based on (parts of ) URL. You can configure patterns using wildcards and regular expressions to direct traffic directly or through a proxy.

So if e.g. your OpenVPN terminates in the the US, you can create a pattern that certain entertainment sites are being accessed through your proxy, while other traffic uses your regular ISP. This is especially useful if you have a capped monthly VPN account.

Posted on July 29, 2020 and filed under Linux, Programming, Security, Software, Tips'n Tricks.

Add Custom Python3 Modules Path (Windows / MacOS)

After installing Python on Windows or MacOS, the installer makes sure that everything works fine. All paths are available/accessible for Python. Adding modules through pip also works just fine.

The problem is that the paths used are hard to remember (e.g. Windows: c:\Users\<username>\AppData\Local\Programs\Python\Python37\), so if you want to use some custom modules you have to use the (complex) default structure, or you can use your own.

Using your own directories for custom modules requires adding the path(s) to the environment variable PYTHONPATH.

Windows

After installing Python, the installer add the PYTHONPATH environment variable to Windows. All you need to do is add your custom path to this variable.

The environment variables can be found through:

This PC -> Properties -> Advanced Settings -> Environment Variables

In screenshots:

MacOS

On my MacOS devices I had to add the path(s) to 2 different files because (regular) GUI based programs (like Pycharm and Python IDLE) use different environment variables than the terminal / console interpreter.

GUI-Based programs

Create a startup plist file (e.g. ~/Library/LaunchAgents/my.startup.plist) and add the following XML content:

<?xml version="1.0" encoding="UTF-8"?>
<!DOCTYPE plist PUBLIC "-//Apple//DTD PLIST 1.0//EN" "http://www.apple.com/DTDs/PropertyList-1.0.dtd">
<plist version="1.0">
<dict>
  <key>Label</key>
  <string>my.startup</string>
  <key>ProgramArguments</key>
  <array>
    <string>sh</string>
    <string>-c</string>
    <string>launchctl setenv PYTHONPATH ~/Python_Scripts/_my_modules</string>
  </array>
  <key>RunAtLoad</key>
  <true/>
</dict>
</plist>

The string ‘~/Python_Scripts/my_modules/’ points to my custom module directory. Edit this to reflect your own directory structure. If you need multiple directories you can add these by seperating them by using a colon (:) e.g.

<?xml version="1.0" encoding="UTF-8"?>
<!DOCTYPE plist PUBLIC "-//Apple//DTD PLIST 1.0//EN" "http://www.apple.com/DTDs/PropertyList-1.0.dtd">
<plist version="1.0">
<dict>
  <key>Label</key>
  <string>my.startup</string>
  <key>ProgramArguments</key>
  <array>
    <string>sh</string>
    <string>-c</string>
    <string>launchctl setenv PYTHONPATH ~/Python_Scripts/_my_modules:~/Desktop/my_scripts</string>
  </array>
  <key>RunAtLoad</key>
  <true/>
</dict>
</plist>

To makes these changes active you can either reboot, log-out/log-in or execute the following command:

launchctl load ~/Library/LaunchAgents/my.startup.plist

Terminal / Console

For the terminal / console based Python interpreter you need to add some lines to the ~/.bash_profile or ~/.zprofile file (depending wether you use bash or zsh as shell).

PYTHONPATH="~/Python_Scripts/_my_modules:$"
export PYTHONPATH

Multiple directories can (again) be added by using the colon seperator (:):

PYTHONPATH="~/Python_Scripts/_my_modules:~/Desktop/my_scripts:$"
export PYTHONPATH

To activate this, just quit the open terminal/console windows (CMD-q) and open it again.

Posted on November 7, 2019 and filed under Programming, Tips'n Tricks.

Cisco ISE MAC Addresss Database Clean Up

Imagine having 15.000+ MAC addresses in a Cisco ISE database. All these MAC addresses are used to gain access to wireless networks protected with WPA2-PSK and MAC-filtering. But how to make sure that they are all (still) valid?

Remove MAC Addresses After Change In Authentication

Finally, the time has come to implement 802.1x on the wireless network for a substantial amount of these devices. These devices are consist mainly of Windows machines or Thin Clients. Both of those are managed through either the Microsoft Active Directory or a Thin Client Management Suite. So, applying setting related to 802.1x are pretty straight forward to distribute. There are however some Windows / Thin client devices that will remain on the MAC-filtering wifi networks for numerous reasons.

After a few tests the migration of the new 802.1x devices has started, but is leaving us with a MAC Address database filled with addresses that can be removed, since they are no longer used…. But how to do that? Cisco ISE has a lot of features, and is capable of generating rich reports about almost everything. However it has no way of reporting on dot1x devices that might still remain in the MAC address database as well. That is where I had to become creative.

First I explored the Cisco ISE Monitoring API, but that only gives active connections. There’s no way of exploring past (successful) authentications/authorizations. I needed a way to get current and past successful dot1x authentications and compare the MAC addresses associated with those entries to the MAC address database, and remove those from that database.

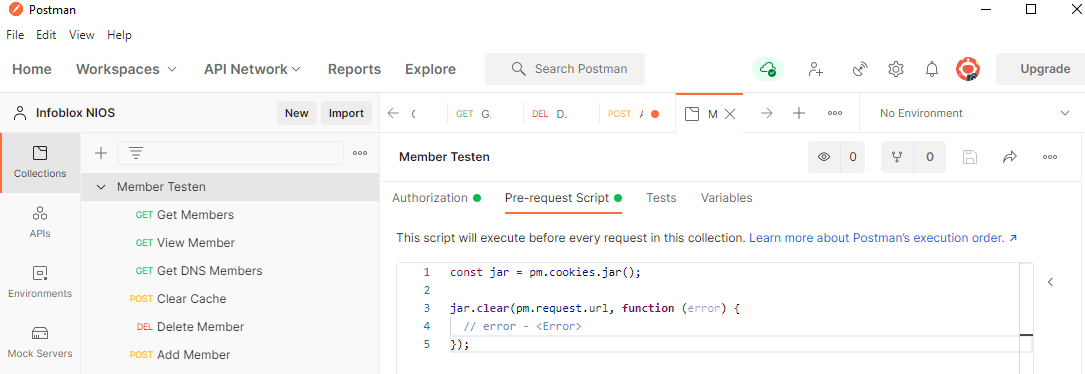
Eventually, I found two paths to accomplish this; First through the reporting module. There you can export all RADIUS authentications to CSV. Filtering these results in Excel, or through Python scripting, you are able to extract the MAC Addresses that successfully authenticated with dot1x. Feed these MAC addresses to a script and remove them through the Cisco ISE ERS API. Or if you’ve got nothing else to do; do it by hand.

The other path is by following the syslog output and parsing that feed. The downside to this is that you have to have syslog file access or add an additional syslog server to Cisco ISE that you may access (e.g. your scripting machine). The syslog version makes a a bit more tricky, since the (syslog)log lines are very long and you have to combine the correct lines to get the full message. Parsing CSV is much easier, so I followed that path first.

Dormant/Obsolete MAC Addresses

Another issue with static MAC addresses (and even local accounts) is that they tend to remain indefinitely in the MAC database. Lang after devices have been decommissioned, the MAC address remains. Which leaves a security hole to be exploited.

By using the generated ‘RADIUS Authentications’ reports over a longer time (e.g. 90 days) you can do a cross reference with MAC addresses in the database and recent successful authentications of that MAC address.
There are some caveats though;

  1. you need a session-timeout on the network (either statically defined on the network device) or by RADIUS return attribute, so that devices have to re-authenticate periodically. Otherwise you might not see a valid device in the logging and removed it by mistake.

  2. RADIUS Reporting goes only 30 days back, so you have to combine several (scheduled) reports to achieve a longer time span. There used to be a custom time frame option, but seems to have disappeared in version 2.6

Update Python Netaddr OUI Database

For a small project I needed to validate ~1500 MAC addresses on validity and their vendor Organizational Unique Identifier id (OUI). So a bit of Python scripting was in order.

I used a regular expression for basic MAC address validation, and the netaddr module to check the OUI of the MAC Address. A simple example of the code is shown below

#!/usr/bin/env python3

import netaddr as na
import re

_mac = '88-E9-FE-1F-65-7D'
if re.match('[0-9a-f]{2}([-:]?)[0-9a-f]{2}(\\1[0-9a-f]{2}){4}$', _mac.lower()):
    print(f'{_mac} - {na.EUI(_mac).oui.registration().org}')

Checking this MAC address online gives a normal result.

macvendors.png

Python (or specifically netaddr) not so much, so there some work to be done. The error clearly shows that the OUI for that MAC address is not registered (in netaddr’s local database).

netaddr-error.png

The problem is that the OUI ‘database’ from netaddr is (extremely) out-dated, so recently assigned OUI’s are not available, and result in Python script errors.

Unfortunatelly, the netaddr documentation doesn’t give any hint on how to update this database. Some searching on the local filesystem showed that there is a oui.txt file within the directory structure of netaddr (which in my case can be seen in the error shown above).

The latest oui.txt (~0.5MB larger than the netaddr version) can be downloaded @ IEEE (the organization were hardware vendors can request new OUI’s). The file location is: http://standards-oui.ieee.org/oui.txt.
I downloaded the file and replaced the original netaddr version. Running the code again gave no solution, since I got the same error. So back to the drawing board.

In the same directory as the oui.txt is a file called oui.idx. This file contains the decimal value of the OUI, and an offset. It turns out that the netaddr codeused this idx file to quickly skip to the actual vendor information in the oui.txt file. And since my idx file was based on the old oui.txt the vendor could still not be found.

The idx file cannot be found on the internet. It’s not something IEEE provides. It’s a file generated from the information in the oui.txt file.

Solution: In the netaddr directory where the oui.txt and oui.idx is located is a ieee.py script. Run that script, and it creates a new idx file based on the oui.txt file in that directory (as shown in the following example).

myhost:eui myname$ pwd
/Library/Frameworks/Python.framework/Versions/3.7/lib/python3.7/site-packages/netaddr/eui
myhost:eui myname$ ls -la
total 12856
drwxr-xr-x   9 myname  admin      288 Jan 26 13:37 .
drwxr-xr-x  11 myname  admin      352 Jan 26 13:37 ..
-rw-r--r--   1 myname  admin    24990 Jan 26 13:37 __init__.py
drwxr-xr-x   4 myname  admin      128 Jan 26 13:37 __pycache__
-rw-r--r--   1 myname  admin    95467 Jan 26 13:37 iab.idx
-rw-r--r--   1 myname  admin  2453271 Jan 26 13:37 iab.txt
-rw-r--r--   1 myname  admin     9500 Jan 26 13:37 ieee.py
-rw-r--r--   1 myname  admin   419098 Jan 26 13:37 oui.idx
-rw-r--r--   1 myname  admin  3566144 Jan 26 13:37 oui.txt

myhost:eui myname$ curl http://standards-oui.ieee.org/oui.txt --output oui.txt
  % Total    % Received % Xferd  Average Speed   Time    Time     Time  Current
                                 Dload  Upload   Total   Spent    Left  Speed
100 4039k  100 4039k    0     0   370k      0  0:00:10  0:00:10 --:--:--  437k

myhost:eui myname$ python3 ieee.py 
myhost:eui myname$ ls -la
total 14336
drwxr-xr-x   9 myname  admin      288 Jan 26 13:37 .
drwxr-xr-x  11 myname  admin      352 Jan 26 13:37 ..
-rw-r--r--   1 myname  admin    24990 Jan 26 13:37 __init__.py
drwxr-xr-x   4 myname  admin      128 Jan 26 13:37 __pycache__
-rw-r--r--   1 myname  admin    95467 May 10 12:14 iab.idx
-rw-r--r--   1 myname  admin  2453271 Jan 26 13:37 iab.txt
-rw-r--r--   1 myname  admin     9500 Jan 26 13:37 ieee.py
-rw-r--r--   1 myname  admin   485973 May 10 12:14 oui.idx
-rw-r--r--   1 myname  admin  4136058 May 10 12:14 oui.txt
myhost:eui myname$ 

After that the output of my script was the following:

/usr/local/bin/python3.7 /Volumes/Python_Scripts/test.py
88-E9-FE-1F-65-7D - Apple, Inc.

Process finished with exit code 0
Posted on May 10, 2019 and filed under Programming, Annoying.

Enhancing Sonoff TH16 Functionality and Domoticz Integration

In my previous blogpost, the Sonoff worked, but was lacking a manual override. The switch could only be triggered by Domoticz. Since it also has a physical push button (connected to GPIO0 (D3)), it can be switched by hand. All that needs to be done is:

  1. Create a new switch device in the Sonoff
  2. Enable 'Rules' in the Tools / advanced settings
  3. Create a rule
  4. Change the On/Off commands in the switch parameters in Domoticz
Posted on January 1, 2018 and filed under Hardware, Programming, Raspberry Pi, Tips'n Tricks, Domotica.

Flashing the Sonoff TH16 Wireless Switch

The Sonoff TH16 is an inexpensive piece of hardware that can be controlled over WiFi. Apart from the switch (that's capable of handling electrical currents up to 16A) there's an interface for temperature and humidity. The actual temp/humid sensor is sold separately (in most cases).

Posted on December 31, 2017 and filed under Gadgets, Hardware, Programming, Raspberry Pi, Tips'n Tricks, Domotica.

Installing Python Matplotlib On MacOS Sierra

I recently 'upgraded' to MacOS Sierra (Apple's latest Operating System) by doing a clean install. This resulted in a couple of challenges, including some software that could not be installed, and for which I had to find some alternatives.

Another issue I ran into is that some Python3 scripts with matplotlib wouldn't run, because matplotlib wouldn't install correctly.
I could 'pip' all I wanted, but the result was always:

$ pip3 install matplotlib
[...]
The following required packages can not be built: freetype

Some googling pointed me to some articles that freetype is/was a part of the XQuartz (X11) software that's no longer (pre)installed on MacOS Sierra. And in the past I have always upgraded my OS. The times that I did a clean install on this machine.... Must have been ages ago.

After some frustrating hours of trying to get this 'freetype' thing installed, I ran into an article on yantonov.com which solved my issue finally.

First I installed 'homebrew'.

$ /usr/bin/ruby -e "$(curl -fsSL https://raw.githubusercontent.com/Homebrew/install/master/install)"

After that I installed pkg-config and freetype:

$ brew install pkg-config
[...]

$ brew install freetype
[...]

And finally, I was able to successfully install matplotlib:

$ pip3 install matplotlib