
When you have a registered Juniper UAC / IC appliance, you have to option to download a VMWare version of the system. This is called a DTE appliance (Development and Test Environment). With this you have a full-blown UAC at your disposal for testing and development. Only downside is that it's limited to 5 connected users. Apart from that, it's just like the real-deal.


Running the DTE in a virtual machine enables me to test / experiment and learn from home (together with my Juniper SRX100 and a EX2200C switch).
Playing with the UAC and SRX in a layer3 enforcement setting resulted in warnings in the SRX config regarding a ca-profile:
It took me a while to make that go away (note that it works fine, you just get a warning). The following paragraphs explain what needs to be done to get rid of the warning.
My UAC has a certificate which is issued by my own Certificate Authority, which I maintain in the excellent open-source tool XCA. The certificate of the Certificate Authority (CA) that issued the SSL certificate of the UAC device needs to be imported into the SRX if you want the warning to go away.
Preperation
You need SSH or serial console access to the SRX device for this to work. I haven't found a way of getting this done through the J-Web interface.
Get a BASE64 encoded version of the CA certificate.
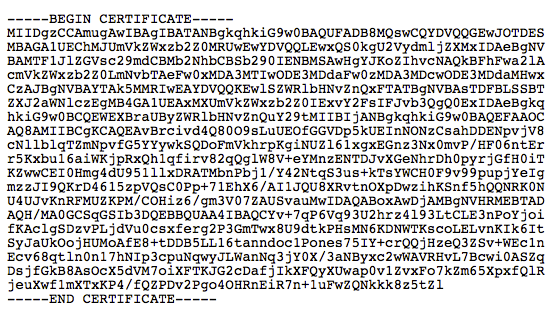
BASE64 Encoded format
Getting the certificate on the SRX
Start the Linux shell on the SRX
root@srx100> start shell

%
create / open an empty file that will contain the BASE64 encoded CA certificate, and paste the BASE64 encoded certificate (including the lines with the BEGIN and END CERTIFICATE parts) in the file.
% vi ca-cert.cer

-----BEGIN CERTIFICATE-----
MIIDgzCCAmugAwIBAgIBATANBgkqhkiG9w0BAQUFADB8MQswCQYDVQQGEwJOTDES
MBAGA1UEChMJUmVkZWxzb2Z0MRUwEwYDVQQLEwxQS0kgU2VydmljZXMxIDAeBgNV
BAMTF1JlZGVsc29mdCBMb2NhbCBSb290IENBMSAwHgYJKoZIhvcNAQkBFhFwa2lA
cmVkZWxzb2Z0LmNvbTAeFw0xMDA3MTIwODE3MDdaFw0zMDA3MDcwODE3MDdaMHwx
CzAJBgNVBAYTAk5MMRIwEAYDVQQKEwlSZWRlbHNvZnQxFTATBgNVBAsTDFBLSSBT
ZXJ2aWNlczEgMB4GA1UEAxMXUmVkZWxzb2Z0IExvY2FsIFJvb3QgQ0ExIDAeBgkq
hkiG9w0BCQEWEXBraUByZWRlbHNvZnQuY29tMIIBIjANBgkqhkiG9w0BAQEFAAOC
AQ8AMIIBCgKCAQEAvBrcivd4Q80O9sLuUEOfGGVDp5kUEInNONzCsahDDENpvjV8
cNllblqTZmNpvfG5YYywkSQDoFmVkhrpKgiNUZl61xgxEGnz3Nx0mvP/HF06ntEr
r5Kxbu16aiWKjpRxQh1qfirv82qQglW8V+eYMnzENTDJvXGeNhrDh0pyrjGfH0iT
KZwwCEI0Hmg4dU951llxDRATMbnPbj1/Y42NtqS3us+kTsYWCH0F9v99pupjYeIg
mzzJI9QKrD4615zpVQsC0Pp+71EhX6/AI1JQU8XRvtnOXpDwzihKSnf5hQQNRK0N
U4UJvKnRFMUZKPM/COHiz6/gm3V07ZAUSvauMwIDAQABoxAwDjAMBgNVHRMEBTAD
AQH/MA0GCSqGSIb3DQEBBQUAA4IBAQCYv+7qP6Vq93U2hrz4l93LtCLE3nPoYjoi
fKAclgSDzvPLjdVu0csxferg2P3GmTwx8U9dtkPHsMN6KDNWTKscoLELvnKIk6It
SyJaUkOojHUMoAfE8+tDDB5LL16tanndoc1Pones75IY+crQQjHzeQ3ZSv+WEc1n
Ecv68qtln0n17hNIp3cpuNqwyJLWanNq3jY0X/3aNByxc2wWAVRHvL7Bcwi0ASZq
DsjfGkB8AsOcX5dVM7oiXFTKJG2cDafjIkXFQyXUwap0v1ZvxFo7kZm65XpxfQlR
jeuXwf1mXTxKP4/fQZPDv2Pgo4OHRnEiR7n+1uFwZQNkkk8z5tZl
-----END CERTIFICATE-----
~
~
~
Save the file and exit the shell.
Creating the ca-profile
Now we create the security profile (which needs to be done BEFORE importing the actual certificate) in the config mode.
root@srx100# set security pki ca-profile UAC-profile ca-identity redelsoft-ca
root@srx100# commit-and-quit
This results in an empty profile where we add the CA certificate the the ca-profile UAC-profile that was created in the previous step.
Binding the CA certificate to the ca-profile
root@srx100> request security pki ca-certificate load ca-profile UAC-profile filename ca-cert.cer
Fingerprint:
  63:12:7a:d5:12:e3:01:33:dc:3d:95:93:16:b1:06:14:37:2b:10:75 (sha1)
  da:e7:71:02:c0:57:19:e5:83:28:7b:bc:33:8e:56:a1 (md5)
Do you want to load this CA certificate ? [yes,no] (no) yes

CA certificate for profile UAC-profile loaded successfully

root@srx100> show security pki ca-certificate detail
Certificate identifier: UAC-profile
  Certificate version: 3
  Serial number: 00000001
  Issuer:
    Organization: Redelsoft, Organizational unit: PKI Services, Country: NL, Common name: Redelsoft Local Root CA
  Subject:
    Organization: Redelsoft, Organizational unit: PKI Services, Country: NL, Common name: Redelsoft Local Root CA
  Subject string:
    C=NL, O=Redelsoft, OU=PKI Services, CN=Redelsoft Local Root CA, emailAddress=pki@redelsoft.com
  Validity:
    Not before: 07-12-2010 08:17
    Not after: 07- 7-2030 08:17
  Public key algorithm: rsaEncryption(2048 bits)
    30:82:01:0a:02:82:01:01:00:bc:1a:dc:8a:f7:78:43:cd:0e:f6:c2
    ee:50:43:9f:18:65:43:a7:99:14:10:89:cd:38:dc:c2:b1:a8:43:0c
    43:69:be:35:7c:70:d9:65:6e:5a:93:66:63:69:bd:f1:b9:61:8c:b0
    91:24:03:a0:59:95:92:1a:e9:2a:08:8d:51:99:7a:d7:18:31:10:69
    f3:dc:dc:74:9a:f3:ff:1c:5d:3a:9e:d1:2b:af:92:b1:6e:ed:7a:6a
    25:8a:8e:94:71:42:1d:6a:7e:2a:ef:f3:6a:90:82:55:bc:57:e7:98
    32:7c:c4:35:30:c9:bd:71:9e:36:1a:c3:87:4a:72:ae:31:9f:1f:48
    93:29:9c:30:08:42:34:1e:68:38:75:4f:79:d6:59:71:0d:10:13:31
    b9:cf:6e:3d:7f:63:8d:8d:b6:a4:b7:ba:cf:a4:4e:c6:16:08:7d:05
    f6:ff:7d:a6:ea:63:61:e2:20:9b:3c:c9:23:d4:0a:ac:3e:3a:d7:9c
    e9:55:0b:02:d0:fa:7e:ef:51:21:5f:af:c0:23:52:50:53:c5:d1:be
    d9:ce:5e:90:f0:ce:28:4a:4a:77:f9:85:04:0d:44:ad:0d:53:85:09
    bc:a9:d1:14:c5:19:28:f3:3f:08:e1:e2:cf:af:e0:9b:75:74:ed:90
    14:4a:f6:ae:33:02:03:01:00:01
  Signature algorithm: sha1WithRSAEncryption
  Fingerprint:
    63:12:7a:d5:12:e3:01:33:dc:3d:95:93:16:b1:06:14:37:2b:10:75 (sha1)
    da:e7:71:02:c0:57:19:e5:83:28:7b:bc:33:8e:56:a1 (md5)
  Auto-re-enrollment:
    Status: Disabled
    Next trigger time: Timer not started
Completing the SRX UAC config
The last step is to add the UAC configuration to the SRX config. When this is committed, you won't get any warnings in regards to the ca-profile.
root@srx100# set services unified-access-control infranet-controller uac.lan address 192.168.1.11

root@srx100# set services unified-access-control infranet-controller uac.lan interface fe-0/0/7.10

root@srx100# set services unified-access-control infranet-controller uac.lan password "$9$mPzn6/A01h9AX-dVY25QF36A"

root@srx100# set services unified-access-control infranet-controller uac.lan ca-profile UAC-profile

root@srx100# show services unified-access-control
infranet-controller uac.lan {
    address 192.168.1.11;
    interface fe-0/0/7.10;
    password "$9$mPzn6/A01h9AX-dVY25QF36A"; ## SECRET-DATA
    ca-profile UAC-profile;
}

root@srx100# commit-and-quit
Connection verification
The SRX enforcer status can be viewd on the UAC Status page.

Green lights means everything is OK
Happy enforcing.